Installing Ubuntu on your computer is easy and typically takes less than 30 minutes, but if you are planning to install Ubuntu while keeping your Windows partition, then the whole process will require more effort and time. It is still easy to dual boot Windows and Ubuntu, but you will have to take extra precaution to make sure any of the partitions are not wiped in the process.
Below are the steps to dual boot Windows and Ubuntu:
In this tutorial, we assume that you have only one hard disk to accommodate Windows and Ubuntu, and that Windows is already pre-installed. All we need to do is to resize the Windows partition, create a new partition and install Ubuntu on this new partition.
1. Boot into your Windows operating system. Make sure you have more than 20GB of free hard disk space available. (20GB is the minimum storage space required to install Ubuntu. If you are planning to use Ubuntu as your default OS, you might want to give it more spaces)
2. Click on the Search bar (or search icon) and type “disk management”. Select the entry “Create and format hard disk partitions”.
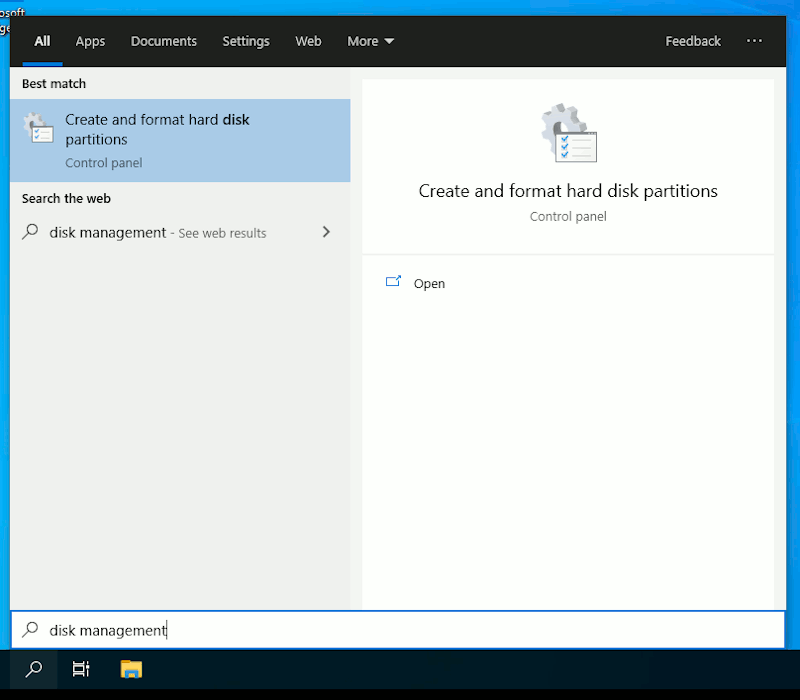
This will open the “Disk Management” window.
3. Right click on the (C:) partition and select “Shrink Volume”.
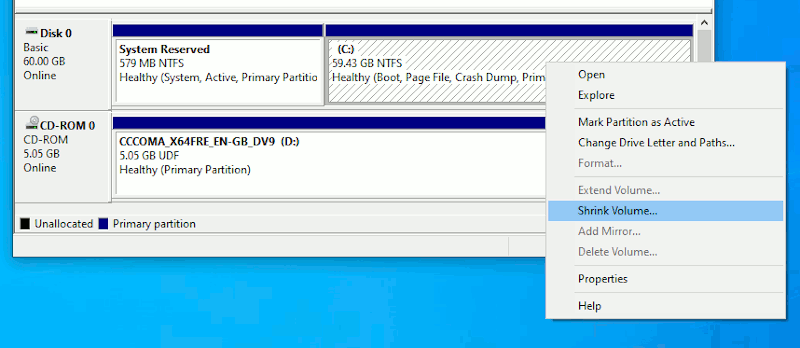
Make sure you have at least 20GB of free space after shrinking.
You can leave it “Unallocated” for now.
4. Download Ubuntu ISO file and use balenaEtcher to create a bootable USB drive.
5. Once you have created the bootable USB drive, leave the USB drive in the USB port and reboot the computer. When the BIOS load up, press F12 (or F2 or Del, depend on your computer configuration) to go into the BIOS settings. Change the USB port to be the first boot priority. Save and exit. If everything works well, you will be booted into the Ubuntu live desktop.
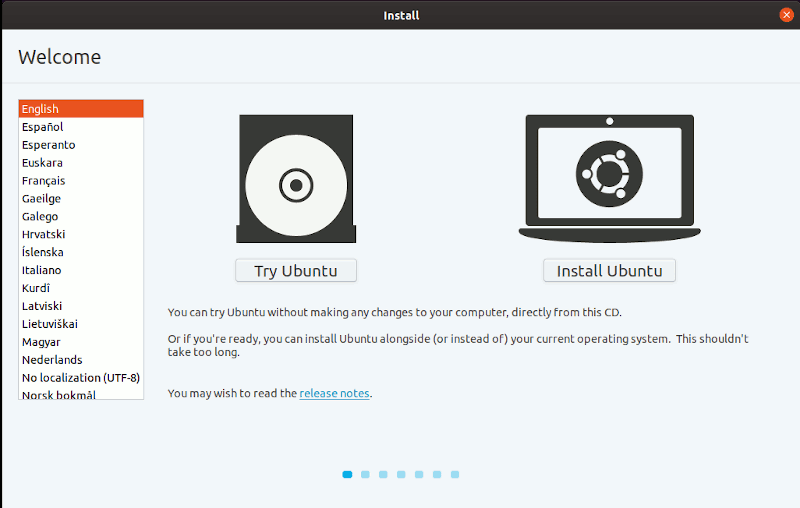
6. Click “Install Ubuntu”.
and press “Continue” on the next few pages, until you reach the Partition page. Here, select “Something else” and click “Continue”.
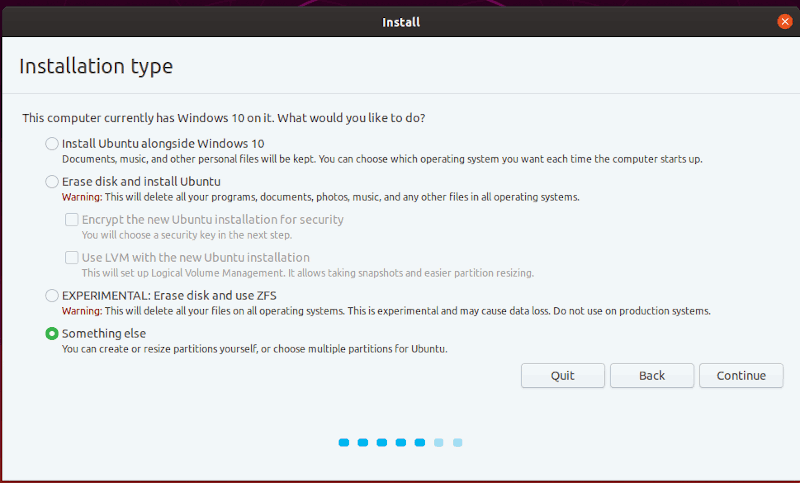
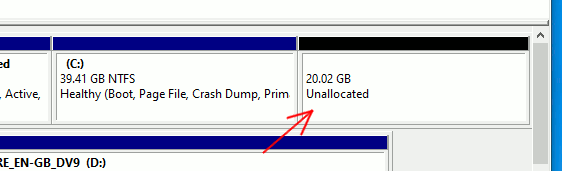
Here you will see a “Free Space” entry. This is the unallocated volume that you created earlier.
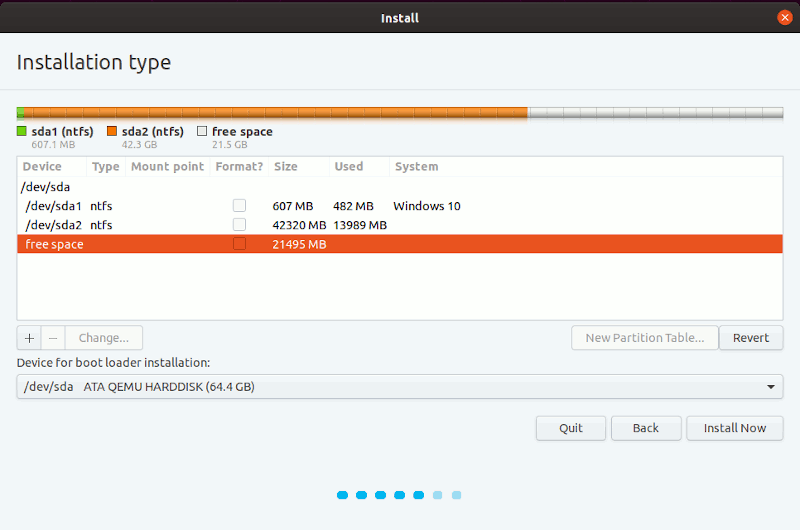
7. Highlight the “free space” entry and click the “+” button.
In the mount point, insert a “/” to it. To keep it simple, we are installing the whole Ubuntu into the partition.
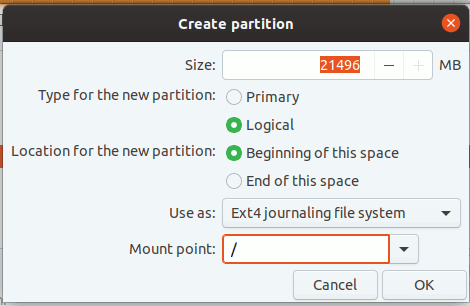
Click Ok.
Note: You can also split the “root” and “home” into two separate partition, but it can get complicated and we won’t cover it here.
8. Back to the Partition screen, click “Install now”.
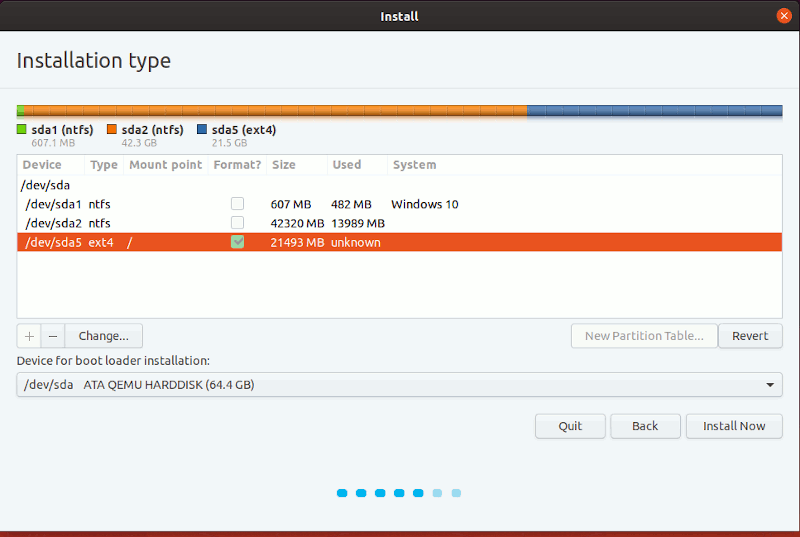
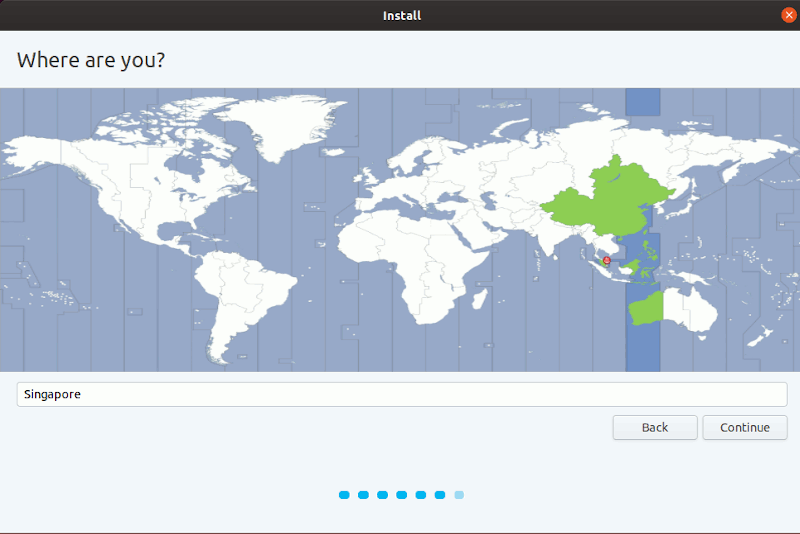
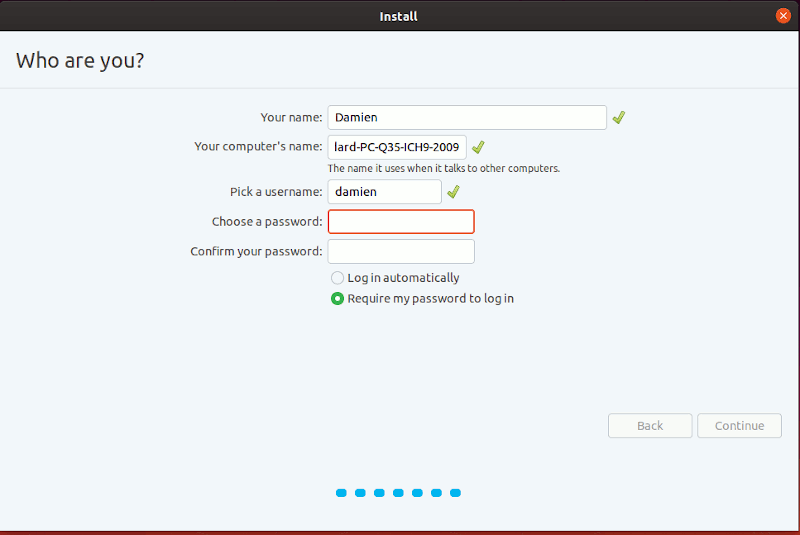
9. The live USB will now proceed to create the partition and install Ubuntu. When prompted, select your location, enter your login username and password.
10. Once the installation is finished, power off the computer. Unplug the USB drive and boot up the computer. You should see a splash screen that allow you to choose to boot to Ubuntu or Windows.
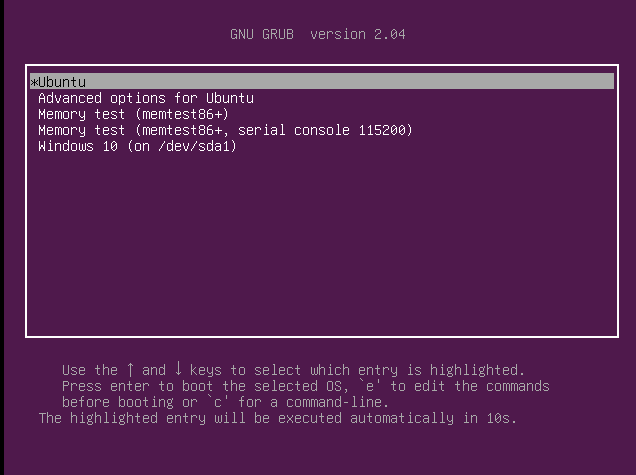
If you didn’t see this splash screen, and the system boot directly into Windows as if Ubuntu doesn’t not exist, then in Windows, open a command prompt and type the command:
bcdedit /set "{bootmgr}" path \EFI\ubuntu\grubx64.efiThat’s it. The above instructions should allow you to dual boot Windows and Ubuntu. The instructions should work for most Linux distribution too.
Be the first to comment! Get the discussion going.